Stefan Elsener
Connect with me
  • Home
  • Portfolio
    • EV
  • Interests

Finished Spitfire Conversion!

8/6/2009

0 Comments

 
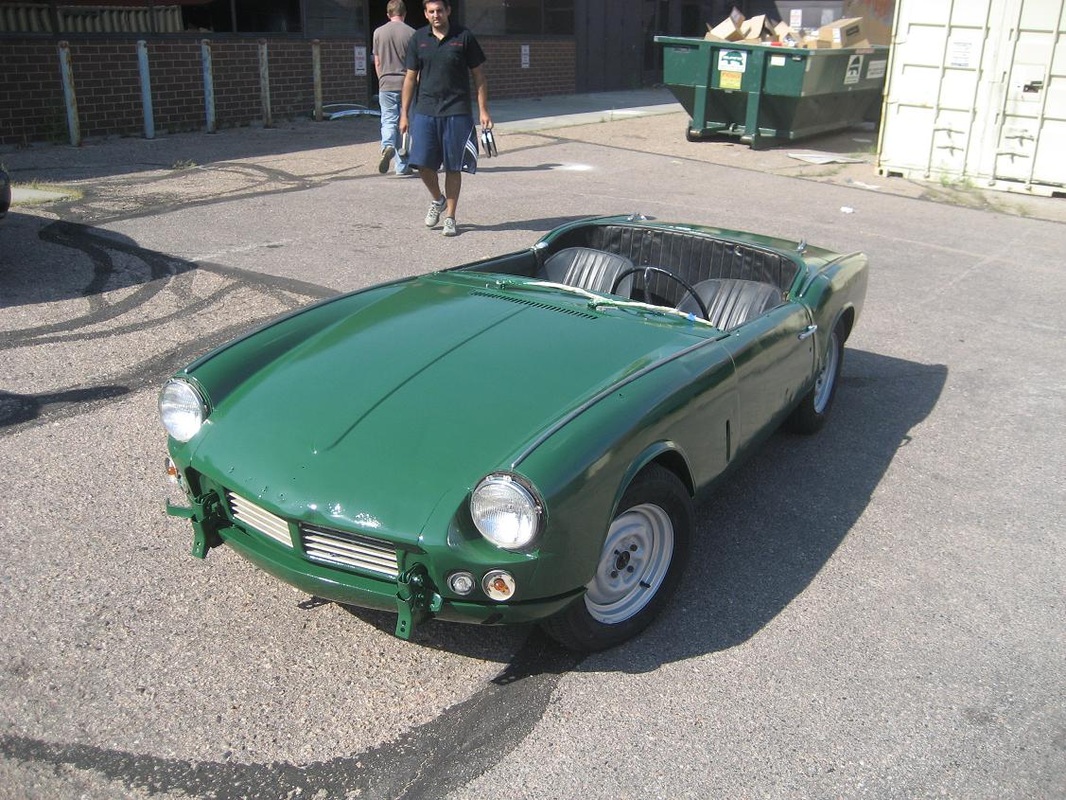
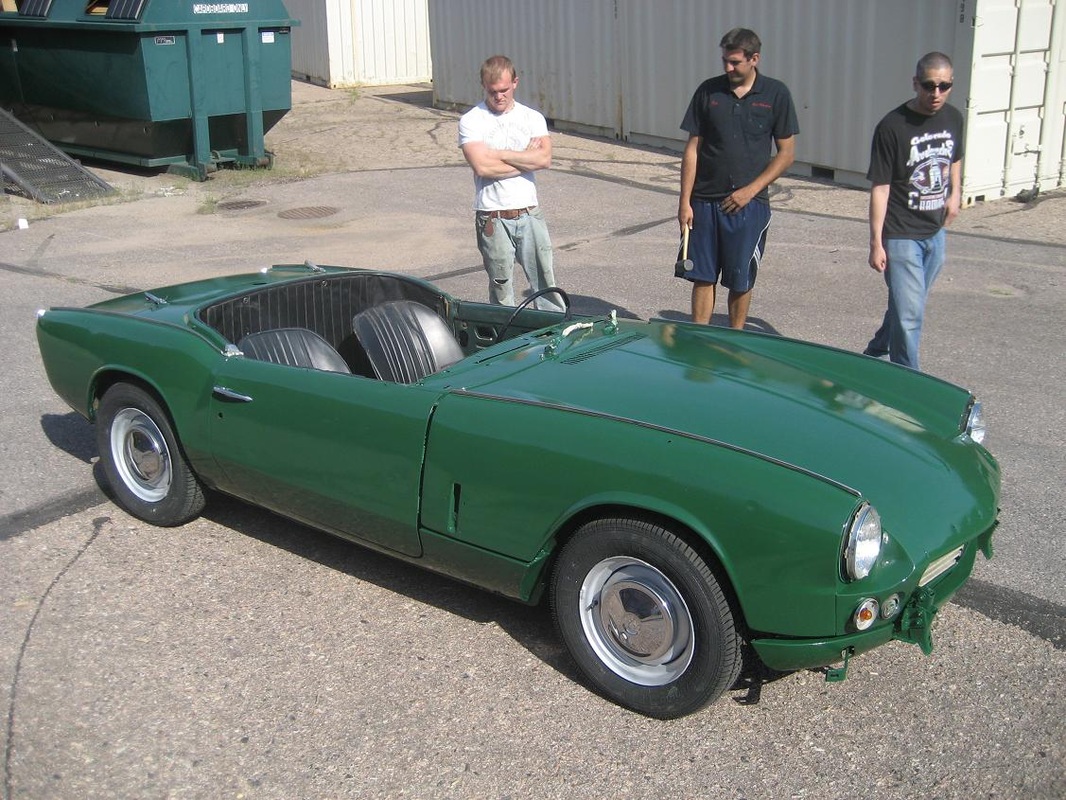
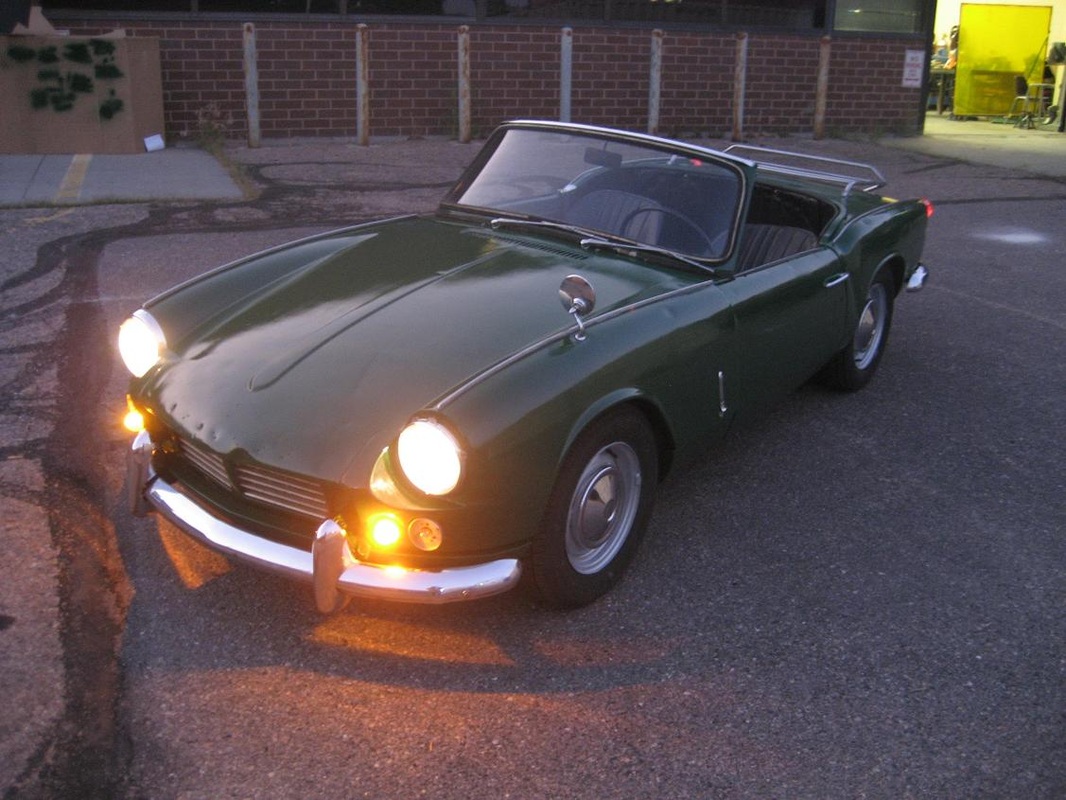
Today we held the unveiling of the Spitfire EV in conjunction with the August ASME Happy Hour Meeting.  Several Denver area engineers showed up to check out the EV and ask questions.  We even got grilled by a couple of local electricians too.

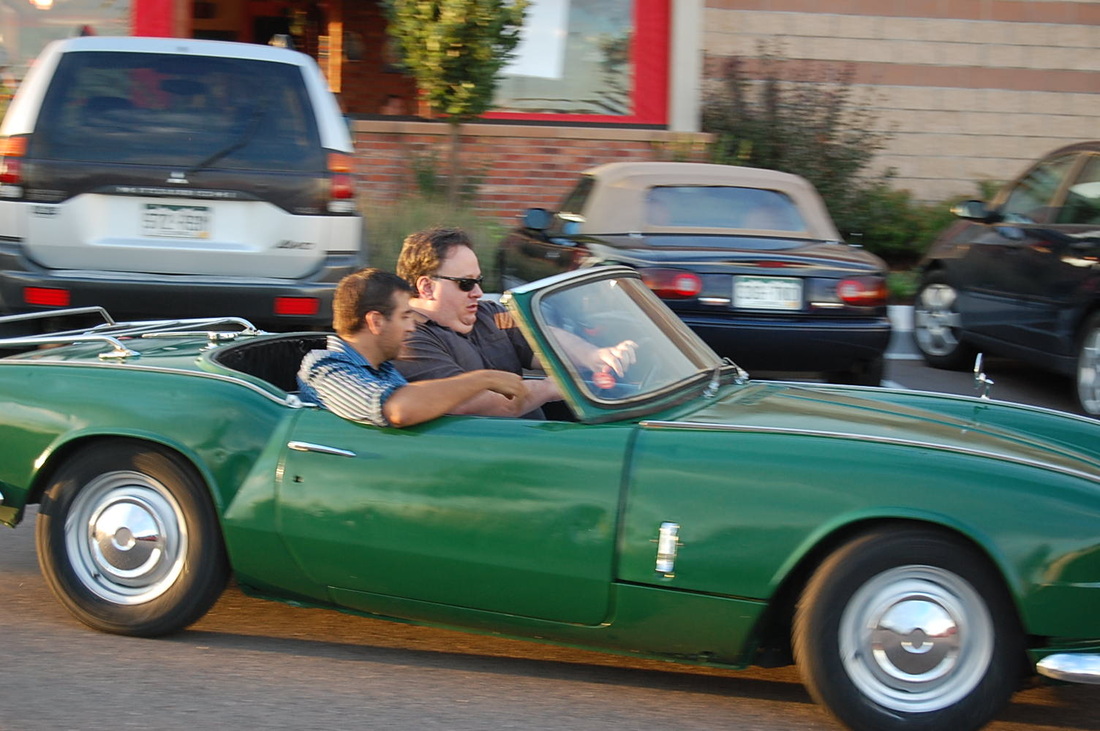
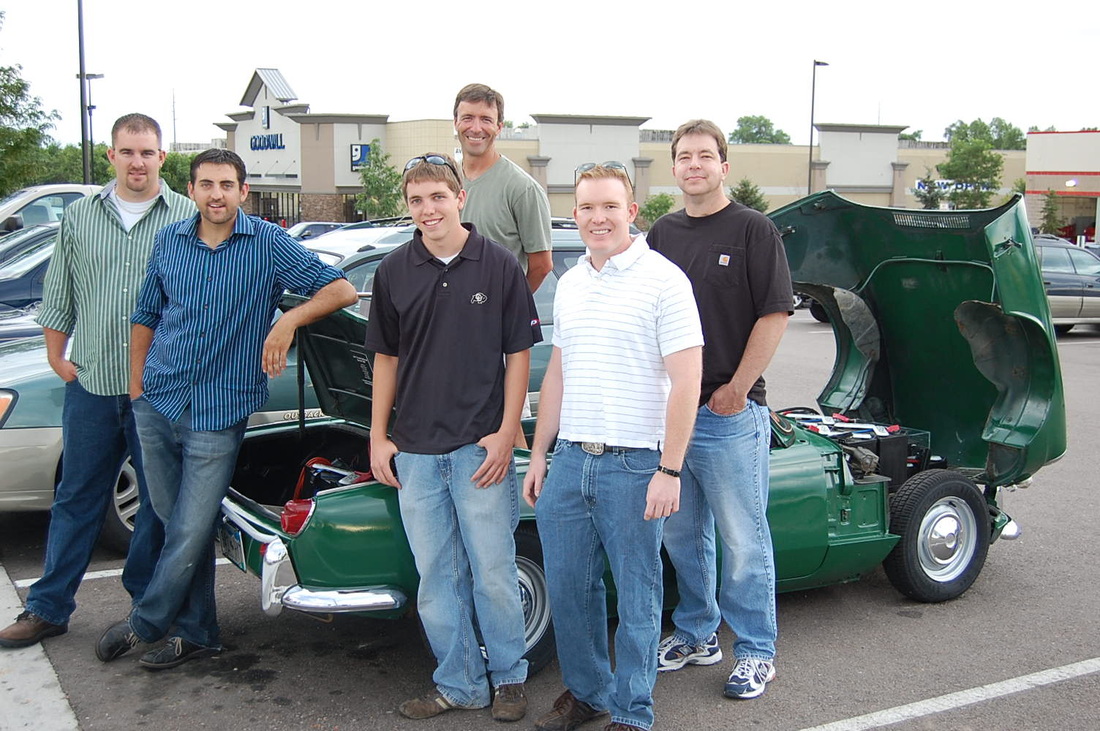
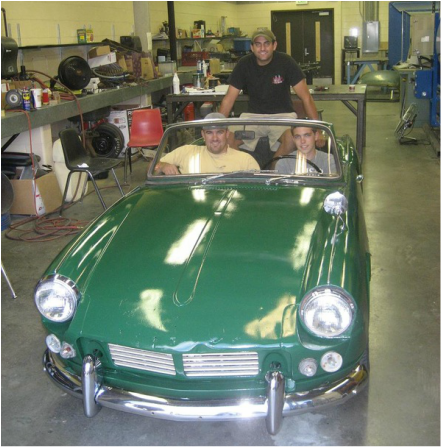
Tim took a ride with a local ASME member and the team got a chance to pose with Jim (the Spitfire's owner) and the completed EV
This has been a fun and rewarding project.  We learned a lot about the art of EV conversions over the short summer.  This knowledge will now be used toward completion of our Senior Capstone projects and graduating with a degree in Mechanical Engineering.

Thanks to:

The University of Colorado Denver's Department of Mechanical Engineering for providing the shop space.

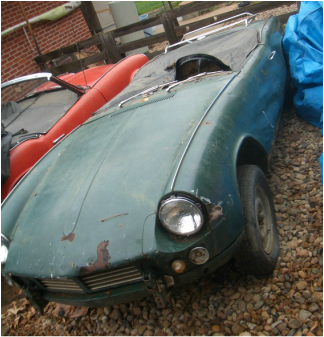
Dr. Ron Rorrer for finding the donor car and encouraging us to take on this project.

Jim Kasic for funding the project and providing the donor car.

Colorado ASME Professional Section for providing the forum for unveiling the car.

KDVR Denver and 2TheDeuce News Stations for helping us get the word out about the great work our students do.

and thanks to the students that made this project possible by coming in on their vacation time to work on a great project.

0 Comments

Speed Test - 75 MPH

7/19/2009

0 Comments

 
Today we showed the 99% completed EV to the owner to much approval.  We still have a few more odds and ends to take care of, but another week and we will be able to present the owner the keys to a completed 1967 Triumph Spitfire Electric Vehicle Conversion.

We added some ferrite rings to reduce the noise in the PakTraker Battery Monitoring System.
Picture
Keith, Stefan, and Tim with the newly painted and 99% complete EV.
Picture
Tonight we completed a Top Speed test on the highway.  The EV shifts nicely from second to third to fourth gear to propel the car up to 75 MPH with some power left to boot!
0 Comments

Paint Job

7/18/2009

0 Comments

 
Today we spent all day painting the 1967 Triumph Spitfire a nice new coat of green.  

Step 1 was to sand down the entire car to get rid of old paint and debris. 


Step 2: We blew off the dust with compressed air and wiped down the entire body with mineral spirits to remove and remain dust or oil from our hands.


Step 3: Tape off all areas of the car that are not supposed to be painted.


Step 4: We applied a coat of primer.

Step 5: We again sanded and wiped down the entire body with mineral spirits.


Step 6: We applied the first coat of paint.

First Coat of Paint Video


Step 7: We let the first coat bake in the sun for approx. an hour.


Step 8: Apply second coat of paint and let it dry.

Step 9: Apply third coat of paint and let dry.


Step 10: Remove tape and paper/tarps and let the entire car bake in the sun to further cure the paint.

Step 11: Inspect for any areas that need to be touched up.

Step 12: Reattach all accessories such as: hinges, trim, bumpers, light covers, windshield, etc...

Step 13: Show off all the hard work...


Before... [05/23/09]

Picture

After... [07/18/09]

Picture
0 Comments

Suspension, DC-DC Converter, & Tires

7/16/2009

0 Comments

 
This week we replaced the front suspension system with new shocks and springs raising the ride height by almost 2 inches.
Picture
We installed the DC-DC converter which will act as a conventional "alternator" and keep the accessory battery charged at all times.
Picture
Also, we finished fabricating the front electronics tray braces. 
Picture
Finally, we were able to get new tires installed on the stock rims.  We painted the old rims a metallic silver to spruce them up a bit.  On Saturday we will be giving the Spitfire a basic paint job to finish its makeover.
Picture
We have conducted several successful test drives.  The EV is breaking in nicely.  The new springs and shocks are working well at keeping the ride smooth going over bumps and potholes.  After we paint the car this weekend we will spend the next couple weeks testing to figure out our top speed and max range characteristics.
0 Comments

More Test Driving

7/9/2009

0 Comments

 
On Wednesday we took the Spitfire on it's first extended test drive.  We drove it about 18 miles with no issues.  We did have a weird sound coming from the motor compartment but after an unsuccessful search and shop test, we took it for another 15 mile test drive and could not reproduce the sound.  It may have just been the motor brushes working in, but we will have to keep an eye on it through more testing.

EV Spitfire in the Wild...We had several people stop and ask questions with the hood open.
Picture
Check out some driving footage of the Spitfire EV below

Some additional progress was also made this week.  We removed the aluminum plate holding the motor controller and replaced it with a finned aluminum heat sink to aid in heat dissipation off the controller. We also re-installed the seats and installed new air shocks in the rear.
0 Comments

First Drive!

6/29/2009

0 Comments

 
On Saturday the EV had it's first test drive moving under it's own power.  We ran into one SNAFU, we had the motor leads switched so that the car ran backwards due to a faulty Curtis Controller diagram.  When it was in forward gear the car moved in reverse.  

Check out the first test drive video below:
Today we fixed our mistake after a quick call to the motor manufacturer, Advanced DC motors.  Now the car runs beautifully except for the whine of the controller at low speeds, but this is normal to most electric motor controllers. We also got the windshield re-fitted and cleaned up for looks.
All that is left to do is install the DC-DC converter, fabricate the front electronics rack and cover, fabricate some water resistance features, upgrade the suspension, and install a better heatsink for the motor controller.  Besides minor fine tuning and aesthetics we are almost there!
0 Comments

Batteries Installed and Suspension Replaced

6/25/2009

0 Comments

 
The battery trays are complete, installed, and painted.  The six front batteries are installed and wired and the PakTraker, battery monitoring system, has been wired.
Now that we have installed the forward batteries, we have found that the suspension system will need to be upgraded with stiffer coil springs to compensate for the extra weight up front.  With stock springs the Spitfire is riding pretty low.
We also got the electronics board wired with the circuit breaker, main contactor, amp meter, and main fuse.  We used 1/4" copper to wire the components together.
Picture
0 Comments

Batteries Arrived

6/20/2009

1 Comment

 
The battery trays are coming along nicely.  We have two mounted in the rear and are working on getting the 4-pack rack mounted in the front.  
At this point we are planning on the first powered test drive taking place in a week or two.  However, we still have to run all the main power cable between the batteries, controller, and motor and finish installing all of the 80 lb batteries.
1 Comment

Battery Configuration, Motor Mount, & New Brakes

6/13/2009

0 Comments

 
We continued fabrication of the ten battery trays today, and nailed down our battery configuration for installation.  Next week we will purchase the ten 80 lb Trojan batteries so that we can double check our clearances before finalizing the installation.
Picture
We also finished the installation of the motor by fine tuning the final 1/2 inch aluminum motor support and bolting it to the frame. Fabricating the motor support was difficult since the existing engine compartment structure was neither symmetric nor aligned. 
Picture
Finally we got the new disc and drum brakes installed and bled.  It will be a huge step up from the rusted out rotors we had before.
0 Comments

Battery Charger, Throttle Control, & Motor Mount

6/10/2009

0 Comments

 
Work continued on the Spitfire conversion today.  We continued work on the battery trays.  Two trays out of 10 have been cut and welded so far.  The battery charger has been placed for installation in the trunk.
Picture
The throttle control (potentiometer) was installed and connected to the existing "gas pedal" linkage. 
Picture
A tie down bracket was fabricated to secure the accessory battery to the firewall.
Picture
Several team members also started fabricating the motor support plate.  We should be able to finish it up in the next session.  
Picture
0 Comments

Let there be light

6/9/2009

1 Comment

 
Today we finished up the 12 Volt Electrical System.  We replaced most of the wiring and reorganized the system.  Doing this allowed us to get headlights, running lights, turn signals, and horn working.  We also installed a green dash light to tell the driver when the car is "hot" since there is no engine noise.
1 Comment

Transmission Adapter, Battery Trays, & Wiring

6/6/2009

1 Comment

 
Another successful work day gone in the books.  Today we focused on finishing the motor/transmission mating.  We finished fabricating the adapter plate as well as welded the clutch spline to the key way collar to create a spline to key way adapter.  It turned out very well.
We also started on the battery trays.  1" angle iron was cut at 45 degrees to prepare it to be welded into rectangular trays.  Then the trays will be grouped and welded together according to the different battery placements (i.e. 4 over the motor, two in front of the motor, and 4 in the trunk over the rear axle).  
Picture
And finally we started work on the car's 12 volt electrical system.  The wiring is a mess and we decided to pull most of it out and start over to repair the damage. Looks like there was an electrical fire at some point.
Picture
1 Comment

Advanced DC Electric Motor

6/4/2009

0 Comments

 
The 8" Advanced DC Electric Motor has arrived.  The motor weighs approx. 100 lbs so it will take some elbow grease to get it and the transmission installed in the car.  Now we have all the major components except for the batteries.  But we still need to fabricate the battery trays so they can wait.
0 Comments

Parts Arrived!

6/1/2009

0 Comments

 
The first shipment of parts arrived today, including the Curtis Motor Controller, Charging System, DC/DC Converter, Cable and Lugs, PakTracker monitoring system, Circuit Breaker, Main Fuse, and Throttle Control.  We also picked up a 16"x43"x0.5" Aluminum plate to fabricate the Motor/Transmission Adapter Plate, Front Motor Support Plate, and Motor Controller Heat Sink.  The motor should arrive later this week.
Picture
0 Comments

Cleanup and Prep

5/27/2009

1 Comment

 
Today was very productive.  We finished cleaning out the interior and trunk to remove all the rust and debris.  We then spray painted the floor pan in the cabin and trunk with rust inhibitor paint to help prevent further rust build up. However, there are some questionable spots that may need to be repaired due to rust damage.
We also removed the transmission in order to make a template for the motor adapter plate.  First a hole was drilled big enough to fit the transmission spline shaft in a piece of particle board.  Then the transmission was placed upside down on top of the particle board with the shaft through the hole. This allowed us to trace out the shape of the bell housing as well as drill through the existing bell housing bolt holes to ensure the proper hole placement for the adapter plate.
Finally we had to address the brake system.  The lines were dry and the master cylinder was seized from years of sitting idle.  With a generous amount of WD-40 and some compressed air, we were able to coax the piston out of the master cylinder.  Then we were able to get the hydraulic brake system "working" but a new seal kit and bleeder valve will help.  The rotors and calipers also need some work before they are road worthy.

1 Comment

Parts Ordered

5/25/2009

0 Comments

 
Most of the components needed for the conversion have been ordered.  This includes the motor, controller, wiring, monitoring system, charging system, DC/DC converter, and throttle control.  Everything should be here within two weeks.

0 Comments

Donor Car

5/23/2009

0 Comments

 
Today we moved the 1967 Triumph Spitfire donor car from it's backyard resting place into the lab.  It needed a good spray down to remove most of the dirt and leaves from sitting outside for years.  We spent the first day beginning to remove the internal combustion components to prepare for the conversion process.

0 Comments

    University of Colorado Denver - ASME

    In the summer of 2009 a group of University of Colorado Denver Mechanical Engineering students completed an ASME sponsored conversion of a 1967 Triumph Spitfire into an Electric Vehicle.

    Special thanks to the student team members: Keith Ray, Stefan Elsener, Tim Jones, Jay Nanninga, Ryan Gaffney, Jon Marts, & Eric Maes.

    Archives

    August 2009
    July 2009
    June 2009
    May 2009

    Categories

    All

    RSS Feed

Proudly powered by Weebly